


Grace Bakes: Dog Treats ?

April 4, 2022
Hi everyone! Welcome back to my monthly column, Grace Bakes. I have some good news for you: I have another great and easy recipe for you guys to make!
This month, though, I am teaching you how to make a treat for dogs, not humans! Technically, humans can eat these (but they won’t taste as good to us — don’t ask how I know that). These dog treats are made with just 3 ingredients, and your dogs will absolutely love them! Don’t have a dog? Maybe you can make them for a friend who does as a gift, especially with Easter coming up.
Fun fact: I run a small dog treat business with my dog, Josie (she helps me with taste testing). Every month, I sell a holiday-themed dog treat, using this recipe, and donate a portion of my proceeds to a local NJ animal shelter.
The great thing about this recipe is that you can use cookie cutters to shape the dough, just like you would with sugar cookies! For the first few weeks of March, I sold shamrock treats, and for the month of April, I am going to sell some spring themed treats! I’m probably going to make flowers, chicks, and bunnies. Cute, right?
Let me give you the ingredients so that you can make some, too!
For the dog treats, you will need:
– 1/3 cup of peanut butter (make sure it is all natural peanut butter; if the ingredient “Xylitol” is on the label, stay away from it! I usually purchase Shoprites “Bowl & Basket” natural peanut butter for these dog treats)
-1 cup of oat flour (you can purchase rolled oats; in the recipe below, I will tell you how to make oat flour from rolled oats!)
-1 small banana, mashed (if your bunch of bananas is on the larger side, you can cut the banana and just mash up half of it!)
-Cookie cutters (these are optional, but if you want to cut them into any desired shape, go ahead and use them! If you want to shape the treats by hand, that’s totally fine too!)
Get your ingredients and measuring cups ready! It’s time to make your dogs some special treats 🙂
-First, preheat your oven to 350 degrees.
-Line a rectangle baking sheet with parchment paper, and save it for later (this will be used to bake the dog treats later!)
–In a medium bowl, mash your banana (or half of a banana) with a fork.
-Add the peanut butter into this bowl and set aside. Do not mix yet!
-Using a food processor, grind up about 1 1/2 cups of rolled oats, which will become your oat flour (I suggest grinding more than a cup of oats, as when they get refined, the measurements can come out to be a little less! So, grind up 1 1/2 cups, and if you have a little extra, you can always save it for later).
-Add 1 cup of oat flour to the bowl with the mashed banana and peanut butter (again, if you have extra oat flour, set it aside for now).
-Using a spatula, mix until all the ingredients are combined. When fully mixed, the dough should be easy to handle with your hands/fingers; if not (sometimes I find that the dough can be a bit sticky/runny from the banana!), add any extra oat flour that you set aside and mix again.
-Repeat this process until you get a doughy consistency that can be utilized with a cookie cutter (if you did not end up having any oat flour left over from the initial cup you used, just use your food processor to grind up a little bit more!)
-Once your dog treat dough is to a good consistency, and this step is completely optional, start cutting out your shapes! They can be holiday themed, or any shape you want. Get creative! (your dogs will be impressed). If you don’t want to use cookie cutters, that’s completely fine, too! Just use your hands to shape the dough into your desired shape. When shaping the dough, I usually cut out the dog treats on a cutting board (or, if you would rather use your hands, mold them into shapes) and then use a spatula to transfer them onto the cooking sheet.
-After transferring all of the dog treats onto the cookie sheet, bake for 9 minutes. Then, let them cool for anywhere between 5-8 minutes.
-This part of the process is also completely optional, but, me being the perfectionist I am, like to do this! Once the dog treats are cooled down, I usually “pick around the edges” of each cookie since some of the oats can sometimes get stuck around the treats! It just gives them a sharper and cleaner appearance after being baked, but, once again, this is completely optional.
-And, finally, give your dog these delicious treats to enjoy!
My dog, Josie, will do absolutely any trick to get one of these! She also ALWAYS, and I mean ALWAYS, knows when I’m about to make them. I simply get out the peanut butter jar and she just starts following me around the kitchen, waiting for scraps of the dough or a “misfit” treat that wasn’t big enough for the cookie cutter!
As a whole, these dog treats are super easy, and are my go-to recipe for my dog treat business. Here are some of the dog treats I have made/sold for different holidays throughout the year:
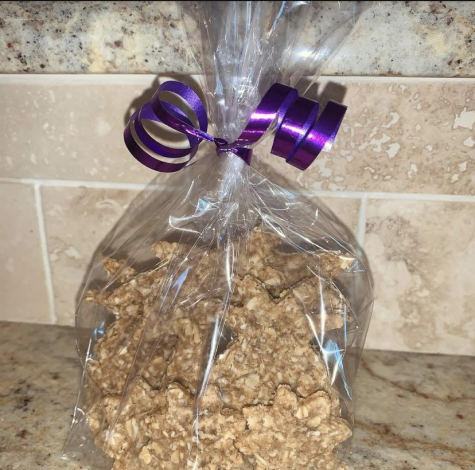
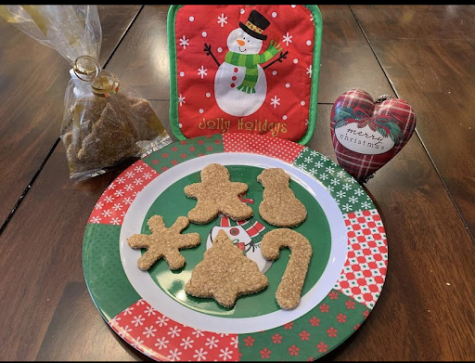
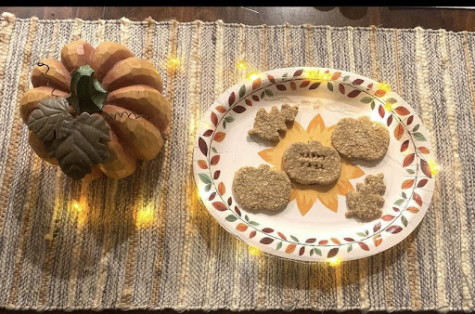
From left to right: summer dog treats (which were pineapples, palm trees, and flowers!), Christmas/holiday dog treats (for the winter), and Thanksgiving treats (for the fall).
These are just a few themes/shapes that you can incorporate into these dog treats; with the numerous amounts of cookie cutters out there, the possibilities are endless!
Now, I wish you guys the best of luck in making this recipe as you continue to improve upon your baking skills. Maybe you guys can get into some baking over this upcoming spring break; I know it seems far away, but it’s definitely coming up quick! Until next time, I hope you enjoyed reading “Grace Bakes.” Stay tuned for another delicious recipe coming up next month!