


Isabella’s Craft Corner: Monster Markers
October 27, 2021
Hello lovely readers! I’m Isabella and welcome to Isabella’s Craft Corner! You will find in this column, some fun and simple step by step crafts that are super fun to do. School is super stressful and overwhelming sometimes so taking time to enjoy yourself and do something that doesn’t require a lot of extraneous thinking can really lift some weight off your shoulders. If you ever try any of my crafts I make on here, I’d love to showcase them. Reach out to me with some pictures of your project at my email, [email protected] – Isabella <3
Halloween is right around the corner and I’m sure no one can ever have enough spooky spirit to really get into the mood. The perfect thing to make right before Halloween, today’s creation: Monster Markers. They’re cute, little Halloween bookmarks that are the perfect alternative to folding those awkward corners into your pristine pages.
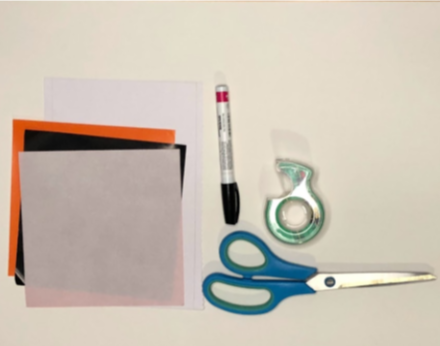
Materials needed: 6” x 6” squares of paper (origami paper is perfect for this but any thinner paper tends to work best), extra paper for decoration, a black marker, tape, and a pair of scissors
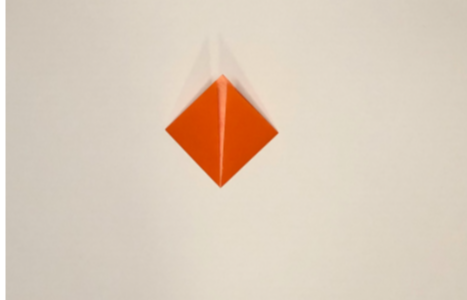
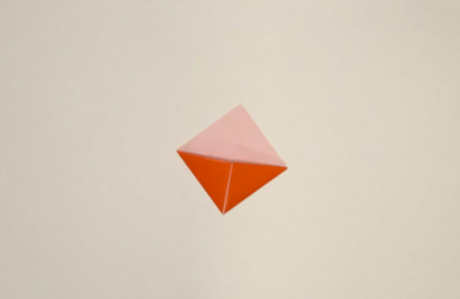
Step 1: Take your one square of your 6” x 6” papers and place it so your corners are pointing towards yourself.
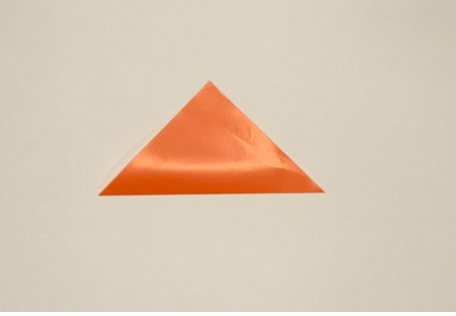
Step 2: Fold your paper into a triangle by bringing the corner points together. (*tip: use an object with a flat edge to press down your folds to get a crisp crease. This will help your folding process altogether)
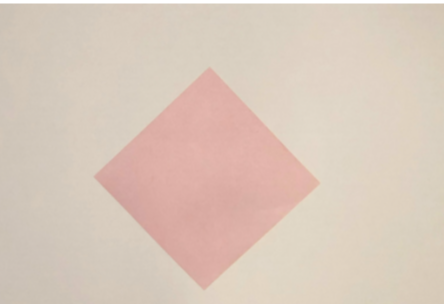
Step 3: Take one of your side points and fold them to the middle point. Repeat on both sides so you have a diamond.
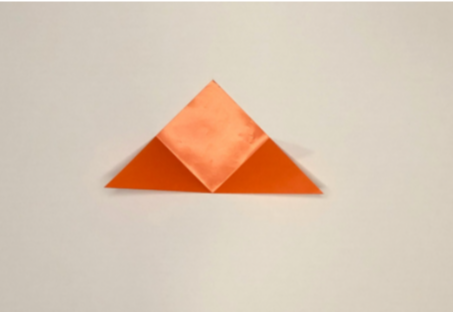
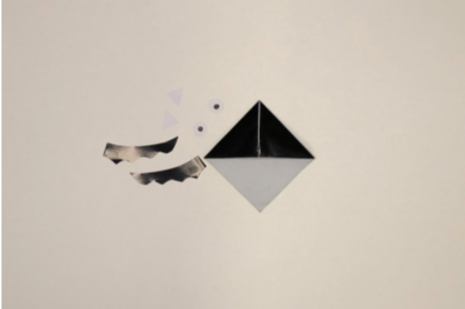
Step 4: Unfold your diamond so you have the large triangle one again and take the top layer of the paper and fold down the middle point to the middle of your triangle’s bottom edge. There should be a diamond shape in the middle created by the inside part of your paper.

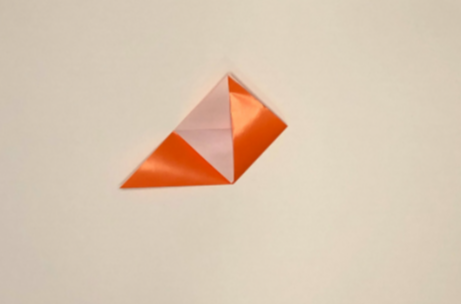
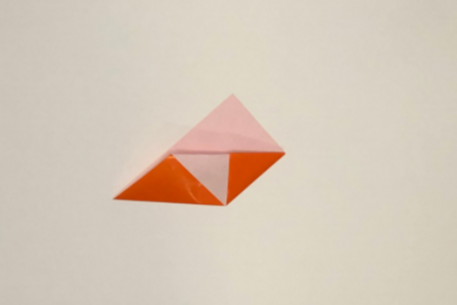
Step 5: Fold one point back up to the middle point like before, then tuck it inside the flap of the middle inner part of the diamond. Repeat on the other side. You should end up with a diamond with one half having two layers of paper and the other half being just one layer of paper. Congratulations! You’ve just created your base bookmark.
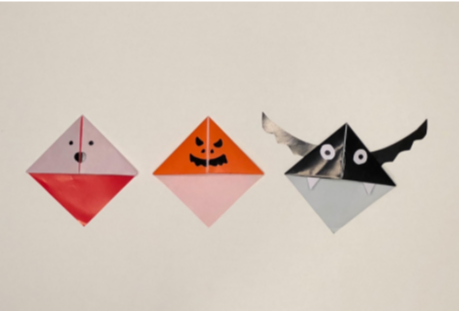
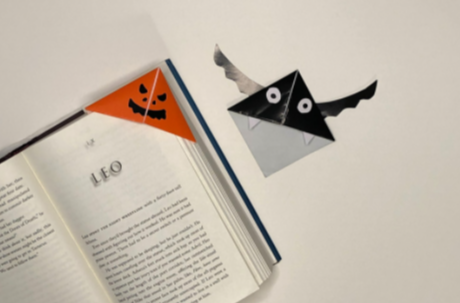
Step 6: Decorate to your heart’s content! Since these are Halloween themed bookmarks, I decorated three different kinds of bookmarks. For this orange one, I used a paint Sharpie and drew a spooky Jack-O-Lantern face (I did the same thing for my ghost too). But for my bat bookmark, I cut out eyes and fangs with some white paper and bat wings in some black paper to perfect my scary look.

Now you’ve got the perfect page marker for the Halloween season! They fit great in any page of a book to keep whatever story’s page you’ve left off on. The book markers even act as cute decorations that really get the whole creepy spirit going. Remember, if you make any of my crafts, I’d love to see them so please shoot me an email and keep me updated.
Keep creating, everyone!